
 by
by Preface
In this tutorial we will analyze 3 types of cameras:
- Security Camera
- Aiming Camera
- Moving Camera
Begin.
Swinging Camera (SecurityCamera)
Consider the simplest camera "Security Camera". For starters, add "Security Camera" to your map.
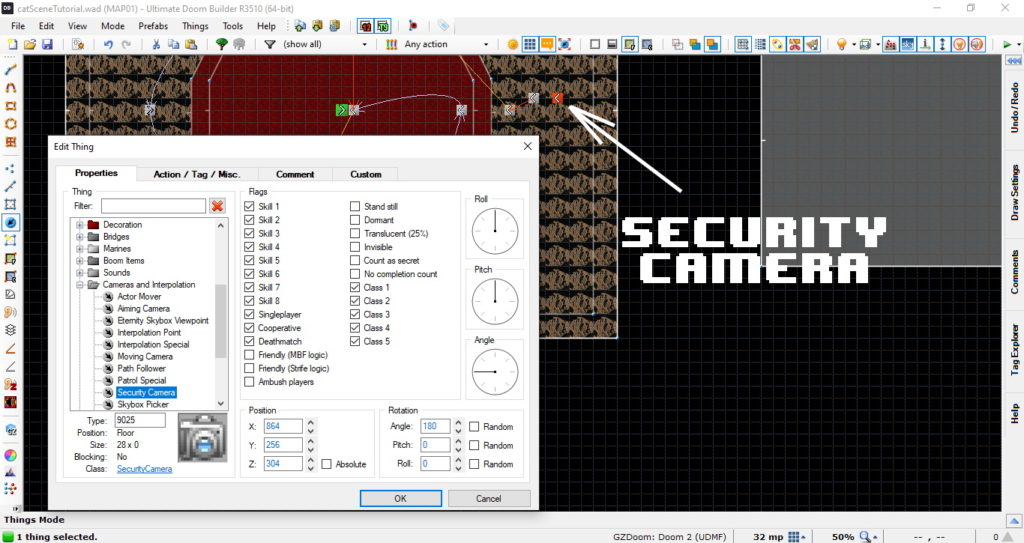
And set it the settings you want.
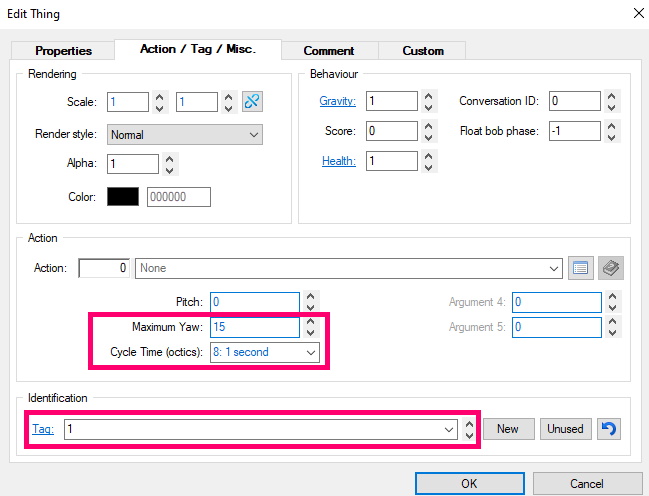
- Maximum Yaw: Specifies the maximum camera rotation angle (left/right)
- Cycle Time (octics):Specifies the time it takes for the camera to turn left/right. The shorter the time, the faster the camera turns.
We pointed out tag: 1to this camera so that we could switch to it. To switch, use the ChangeCameracommand.
Now rewrite the following code to your ACS:
#include "zcommon.acs"
script 1 ENTER
{
 ChangeCamera(1,0,0);
}
Script 1 will start, at the time of connecting the player to the card(ENTER). Let's look at the syntax of ChangeCamera:
ChangeCamera(tid_camera, tid_player, revert);- tid_ camera – the player will see the image of this camera.
- tid_player – who will see the image of the camera.
- revert – if true,then any action will return the player to his original camera.
Now let's run.
Let's move on to the next camera.
Aiming Camera.
This camera is constantly pointed at the object, with the right tid.
First, put"Aiming Camera"on your map.
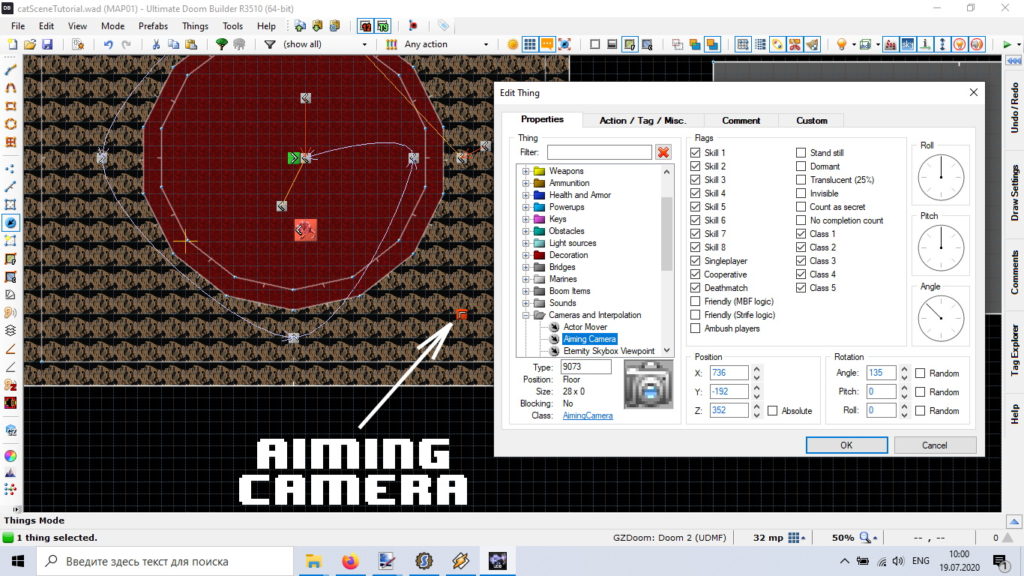
And set up the camera.
- Pitch – indicates the initial rotation of the camera up / down.
- Max. yaw per second – sets the rate of change yaw,when hovering.
- Max. pitch per second – sets the rate of change pitch, when hovering.
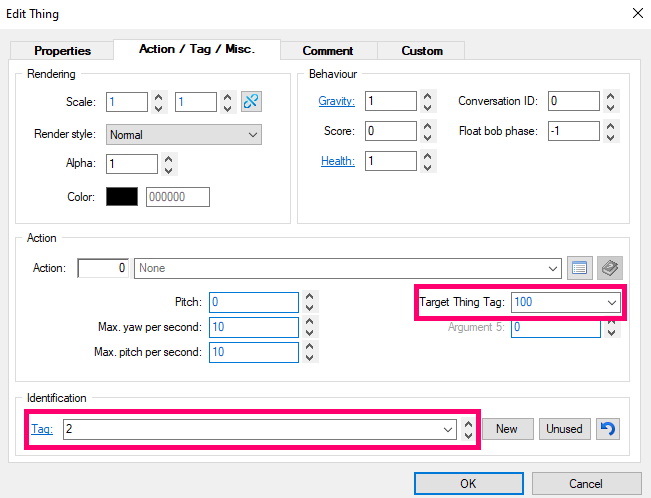
- Target Thing Tag – indicates the tid of the object that the camera is pointing at.
Now in ACS,with ChangeCamera,switch to the desired camera.
ChangeCamera(2,0,0);And put the monster on the map, with tid = 100. Done, now the camera will be pointed at the monster.
But, if you want the camera to be pointed at the player,you will have to lining around a bit. First, add the following code to ACS:
script 1 ENTER
{
 Thing_ChangeTID(0,100);
 ChangeCamera(2,0,0);
}
The Thing_ChangeTID team replaced objects with tid = 0with objects with tid = 100. In fact, this means that the player now has tid = 100.
Now, the camera will be pointed at the player.
Moving Camera (MovingCamera)
This camera is the most advanced, and the most interesting, in my opinion. This is the same camera that you saw in the preview.
First things first, put "Moving Camera" on the map.
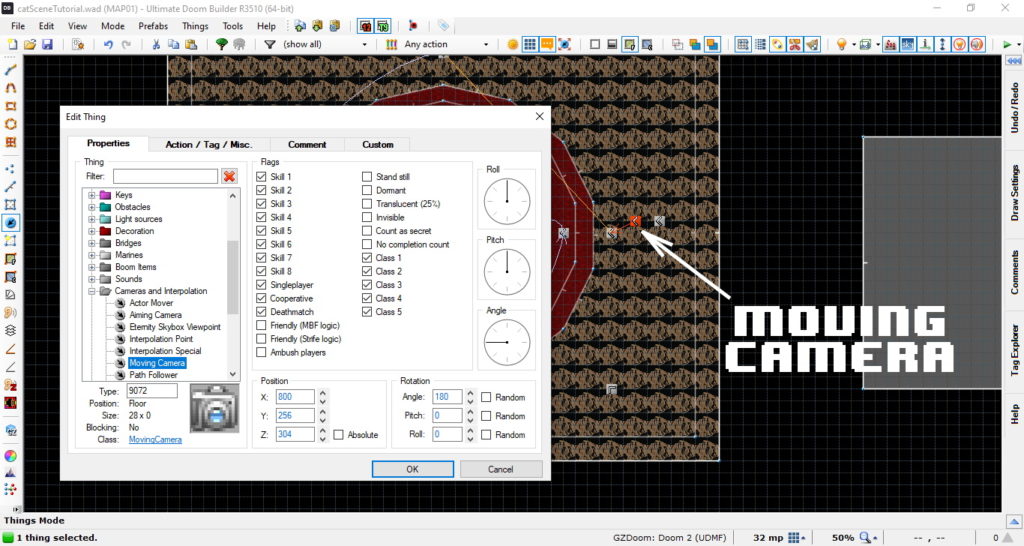
And set it the necessary settings.
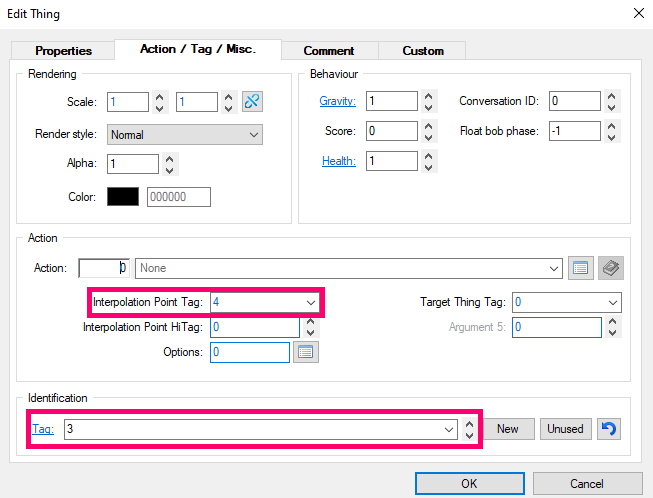
"Moving Camera" works in conjunction with "Interpolation Point", so in the interpolation Point Tag column – set the tag of the first point (in our case 4).
More about Interpolation Point,I told in the lesson ZDoom. Moving SkyBox.
Ok, throw a path to our camera.
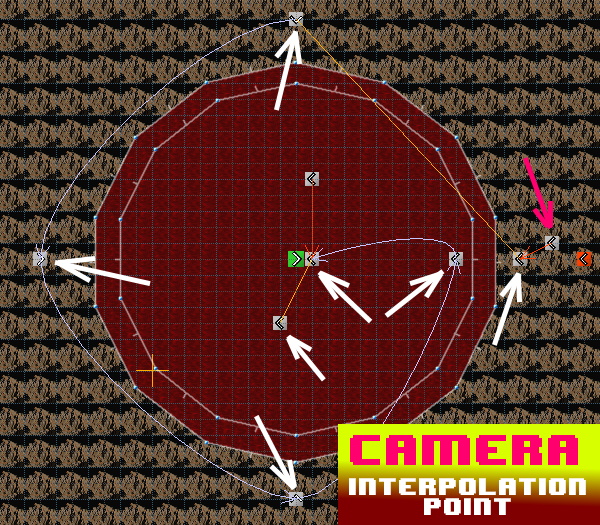
Also, to any of the"Interpolation Point"you can bind an action (calling a script, opening a door). This is done with the help of "Interpolation Special".
Create "Interpolation Special" and assign it the same tidas "Interpolation Point"
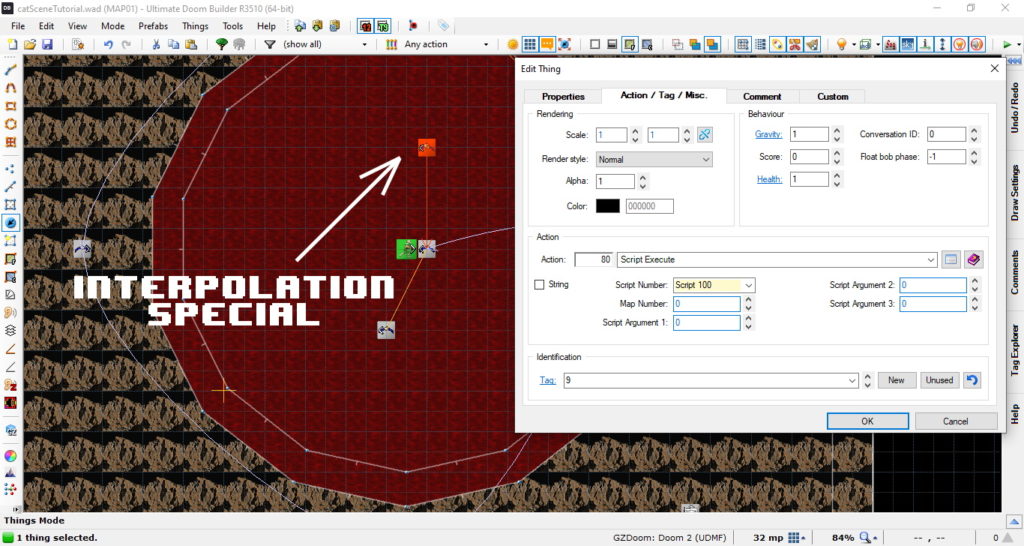
And we point him to the desired Action,in our case, call the script. By the way, the code of this script is presented below.
script 100 (void)
{
 ChangeCamera(0,0,0);
}
This script returns the camera to the player.
Let's see what happened.