by
by Preface.
Thanks to the lesson SGDK. Creating image, we already know how to import an image into SGDK. First, draw the image in paint.net, then cut the palette to 16 colors. This method has a significant disadvantage, namely, for each picture a separate palette is created. And, the number of palettes is limited to 4 palettes, so you need to skillfully use the same palettes in different images.
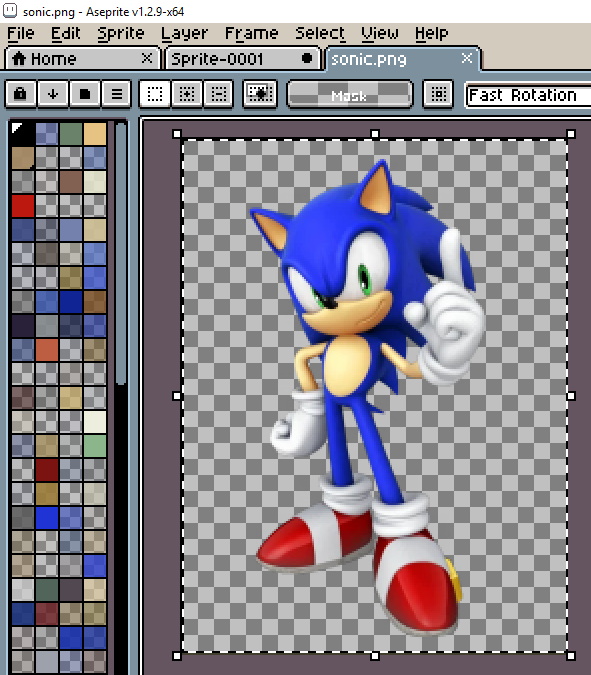
We’ll need Aseprite to work.
Draw an image in Aseprite for SGDK.
Create a new image, select Indexed in the Color Mode column and click OK.
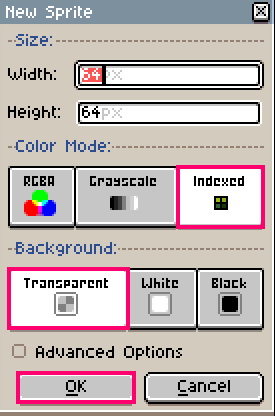
Now, choose any 16 color palette. I chose PICO-8 because it’s bright.

And start drawing. Note, 1st color palette, fully transparent. In sega, it will also be transparent.

Next, use this palette for all the monsters in the level. Now, you no longer have to create a new palette for each monster.
Adjust the image to the palette.
Drag the image to the Aseprite window

When you open the image, select and copy.
And transfer it to an image with a 16-color palette created earlier.

The image palette will be reduced to 16 colors.
Automate the process of reducing the palette.
Aseprite can reduce the palette and can adjust the image to the palette.
And also, it can be launched from the console, without opening the program window. That’s what we’re going to use.
But first, you need to specify the path to aseprite.exe in the PATH variable. That you could open Aseprite from anywhere, through the console.
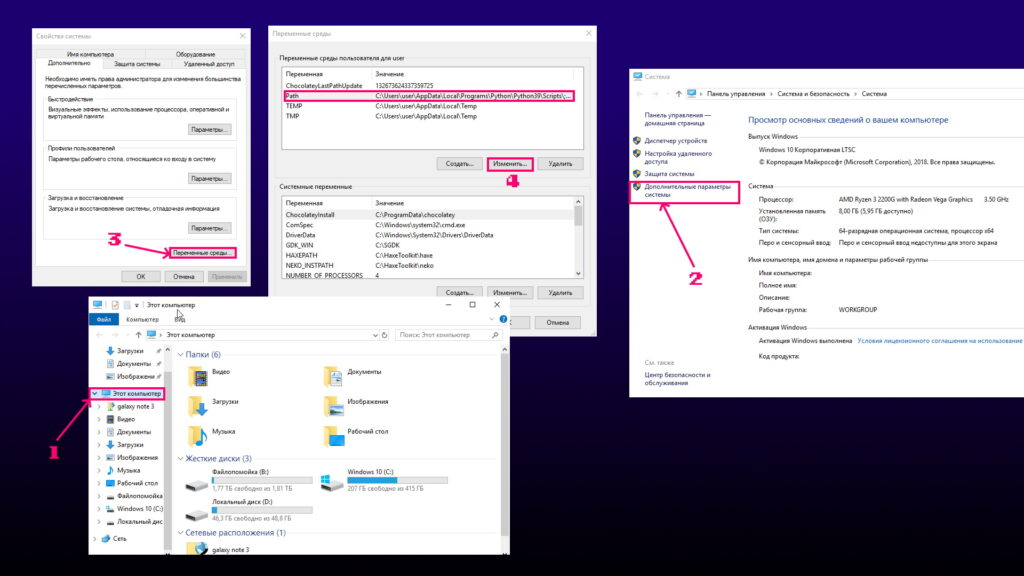
- In Explorer, click RMB(Right Mouse Button) on This computer->Properties
- Next, Advanced Environment Settings.
- Then, Environment Settings.
- And Path -> Change.
Create a new environment variable by writing the path to the folder with Aseprite.
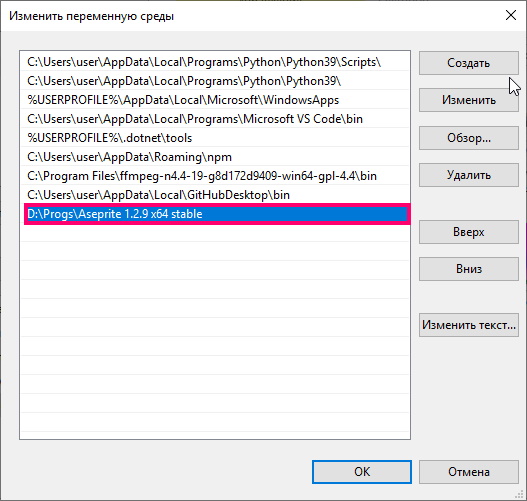
Click OK to save the result.
Now, type Aseprite in the console, and press ENTER. If you’ve done everything right, Aseprite will launch.
Below I have gave a useful command.
Puting image in indexed mode.
aseprite -b path_to_image --dithering-algorithm ordered --color-mode indexed --save-as path_to_imagepath_to_image – replace with your own.
-b – means that the program window will not open.
Details about aseprite arguments here.
This command puts the image in indexed mode, which is necessary to preserve transparency. Use it when you need a unique palette and when you are sure that the image palette contains less than a 16 colors.
A similar operation can be performed in Python, thereby automating this action.
image_url = "path_to_image"
process = subprocess. Popen( ["aseprite", "-b", image_url, "--dithering-algorithm", "ordered", "--color-mode", "indexed", "--save-as", image_url] )
process.wait()
Reduce the image palette to 16 colors.
Install the Pillow and libimagequant libraries by entering the following commands into the console.
pip install Pillowpip install libimagequantNext, download the reduce palette script from MEGA.
Inside the script, replace the image_url with your path to the image. And run the script.
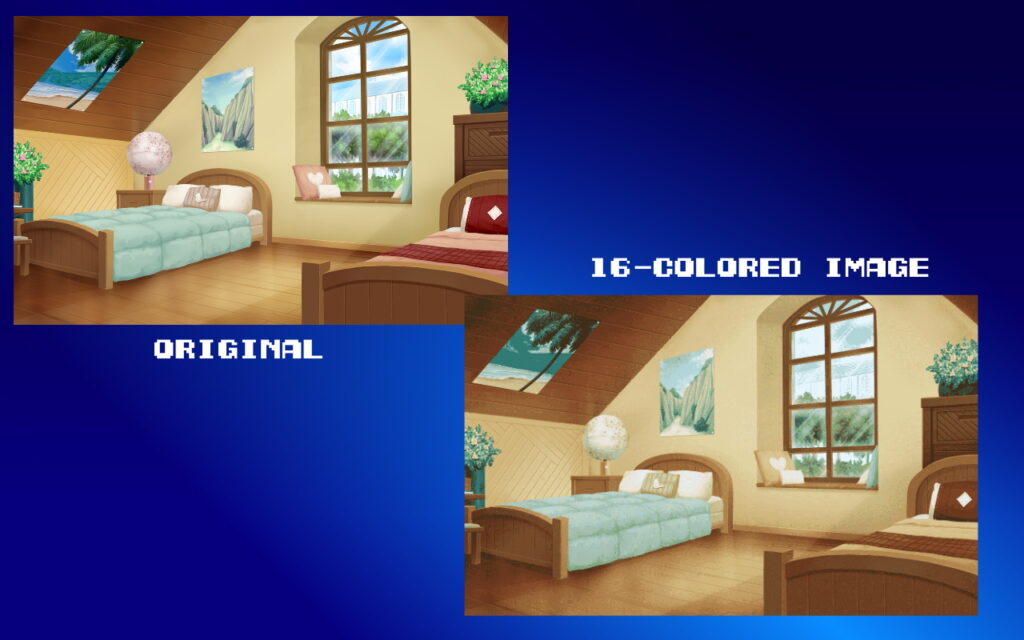
Surprisingly high-quality picture, for a 16-color image. This is achieved through dithering.
Dithering in the script set to maximum, but if you disable it.
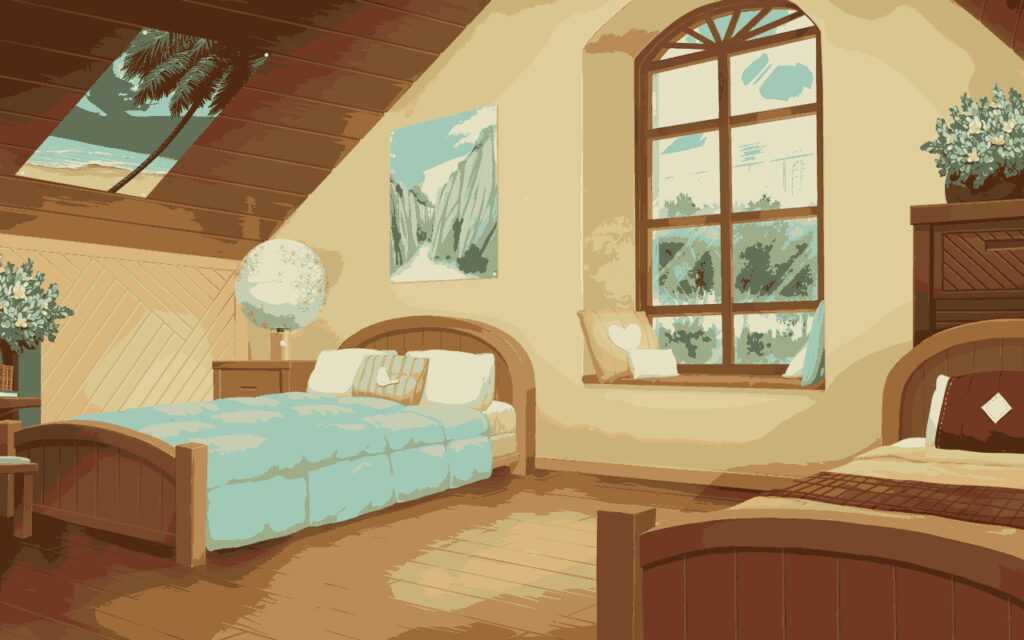
The picture will lose a lot of detail, which is not very good.
In any case, use this script when you want to reduce image palette.
Adjust the image to the palette.
If you want to convert image to your palette, use this command.
aseprite -b path_to_picture --palette path_to_picture_palette --color-mode indexed --save-as path_to_pictureThis command, converts image palette path_to_picture to palette path_to_picture_palette. Use it for entity, because there are a lot of them on the screen, and for each entity to creating their own palette, simply will not work.
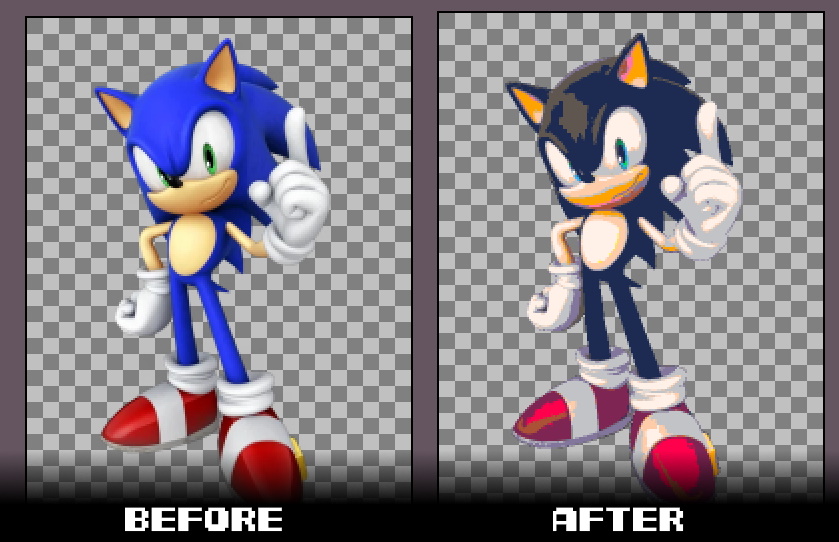
In the end, I will leave my own example of using this approach.
Final result.